Documentation
Frequently Asked Questions about the HubSpot Foodie Theme
Have more questions? A feature request? Is something missing below?
Send me an email at stephanie@stephanieogaygarcia.com
Where do I find my theme?
How do I configure my theme settings?
How do I configure my theme colors?
How do I create and edit pages?
How do I show or hide the search bar in the header?
How do I show or hide the recipe module?
How do I update default content on the recipe module?
-
After you've successfully downloaded the theme from the HubSpot Marketplace, in HubSpot's navigation go to Marketing > Files and Templates > Design Tools and you should be able to find it under the @marketplace folder on the left-hand sidebar.
-
One of the first things you'll want to do is configure your theme settings. When you first download the theme the colours, in particular, may look a little strange as they are pulled in from your branding settings.
You can configure your theme settings in two ways:
- By going to Settings (the gears icon in HubSpot's navigation) > Website > Themes and selecting the Conference Theme.
- From any page editor by clicking into the Design tab on the left of the page > Edit Theme Settings
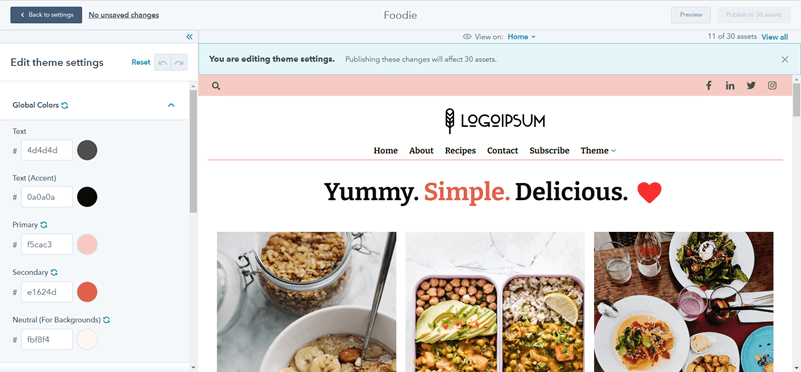
Under your settings, you'll have options to customize your theme's colours, fonts, spacing, text, buttons, forms, tables and styling for your header and footer.
Read more on HubSpot's "Edit your theme settings" knowledgebase article.
-
The theme uses five colour fields that, when changed, will update your website globally: Text, Text (Accent), Primary, Secondary and Neutral (For Backgrounds).
These colours are automatically pulled from your branding settings (read HubSpot's "Customize branding for your HubSpot content" knowledgebase article here).
From your branding settings:
- "Primary" uses the "Primary" colour in your branding settings, this is the main colour, the light pink on the demo site (#f5cac3)
- "Secondary" uses the first colour in your branding settings, this is a secondary accent colour, the dark pink on the demo site (#e1624d)
- "Neutral (For Backgrounds)" uses the second colour in your branding settings, it's the cream colour used for backgrounds on the demo site (#fbf8f4)
You can update these colours either from your branding settings or override them here in the theme settings.
-
HubSpot's drag-and-drop editor should be easy and intuitive to use. For the most part, you should be able to click anywhere on the page to edit, rearrange, add or delete content.
Follow the instructions here to create a page using one of your theme's templates. Within the page you have several elements:
- Section: this is the container that wraps your content. To add one, hover over the bottom of any section and a "+" sign will appear - from there you can choose one of the theme's prebuilt sections or a layout. You can also save sections you like for future use. When you have your section, you can edit its background (image, colour, gradient...), spacing and alignment as well as drag content into it.
- Columns: within your sections, columns allow you to arrange your content vertically.
- Rows: within your sections and columns, rows allow you to arrange your content horizontally.
- Modules: while all of the above is mostly structural, modules are where you actually add your content such as text and images. HubSpot includes several default modules such as Rich Text, Image, Form... etc. and your theme includes several custom modules such as Accordion, Blog Posts, Custom Button... etc.
For more detailed tutorials from HubSpot check out this article.
If you're new to editing on HubSpot, I'd also recommend taking time to review HubSpot's CMS for Marketers certification - in particular the "Creating Pages in the HubSpot CMS" section.
-
(Version 2+)
You can choose to show or hide the search icon / search bar in the header. For example, if you're on HubSpot CMS Free, you may prefer to hide it as it does not include search results pages.
Follow these steps:
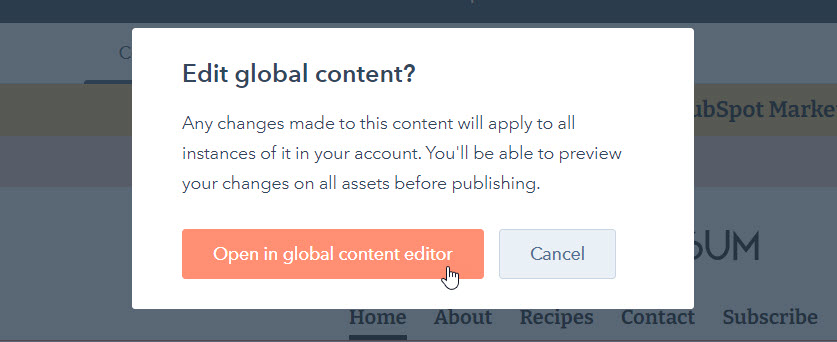
- Open the global header. Go to any of your pages and click on the header to go to the global header group. This will show a pop-up that asks whether you'd like to update global content. Click on "open in global content editor".
- Click into the "Show Search" field. Once you're in the editor, click into the "Content" sidebar and find the "Show Search" field:
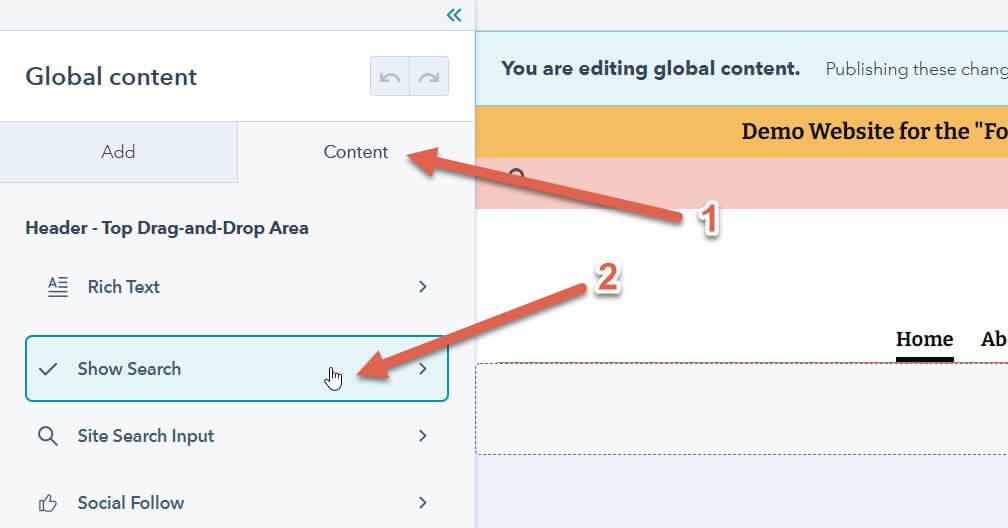
- Update the "Show Search" checkbox value. You can check the "Value" checkbox to show the search bar, or uncheck it to hide the search bar. Click on "Apply Changes" below to preview.
- Publish. Once you've updated the option to show or hide search, click on the "Publish to[number] assets" button on the top right hand corner of the page. Note that this will publish your changes to every page that uses the global header.
- Open the global header. Go to any of your pages and click on the header to go to the global header group. This will show a pop-up that asks whether you'd like to update global content. Click on "open in global content editor".
-
When editing any post using the Foodie theme's Blog Post template, you can choose whether to show or hide the recipe module.
To do so:
- Find the "Show Recipe Card" item in the sidebar under "Contents"
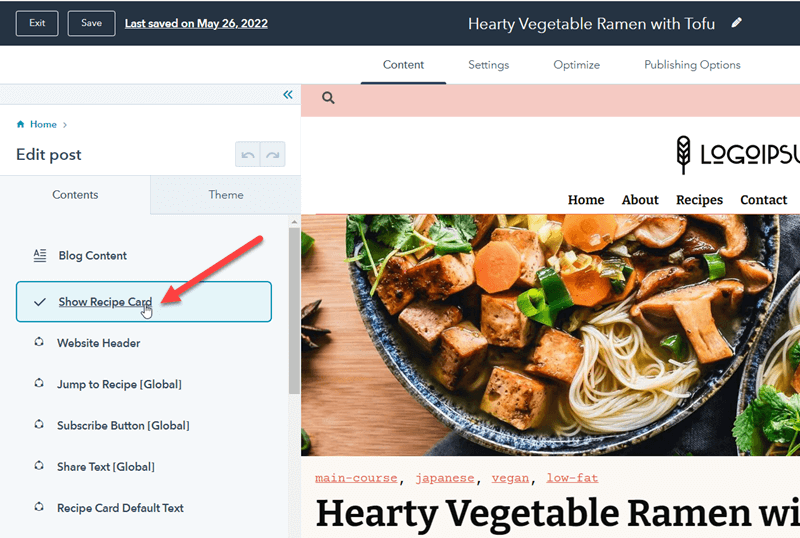
- Click into it and check the checkbox to show the recipe module or uncheck it to hide it.
- Click on "Apply Changes" below
Note that you may need to reload the page after enabling or disabling this option to see the results.
- Find the "Show Recipe Card" item in the sidebar under "Contents"
-
In the Recipe custom module found on the blog page, there are several text items that are hard-coded into the module, things like "Category", "Prep Time", "Ingredients"... etc.
You may wish to change this text if you are blogging in another language, for example.
To do so:
- Edit any blog post using the Foodie theme Blog Post template.
- Scroll down to the recipe module and, above, you should see a big button that says "Edit the recipe module's default text (This button is only visible within the editor)", click on it. If you don't see this option, make sure that the recipe module is visible.
- It will lead to a global partial template where you can edit each item on the sidebar. For example, I can click into "Ingredients" in the sidebar and update the text to "Ingredientes" if I'm blogging in Spanish. Clicking "Apply Changes" will show the new text in the preview.

- Clicking on the "Publish" button in the upper right hand corner of the page will set your changes live.
Note that changes made here will apply to all of your blog posts, not just the one you are currently editing.
-
After you've successfully downloaded the theme from the HubSpot Marketplace, in HubSpot's navigation go to Marketing > Files and Templates > Design Tools and you should be able to find your theme under the @marketplace folder on the left-hand sidebar.
To edit the code on any file, template or module, you will need to create a child theme.
-
Contact me at stephanie@stephanieogaygarcia.com with any questions.